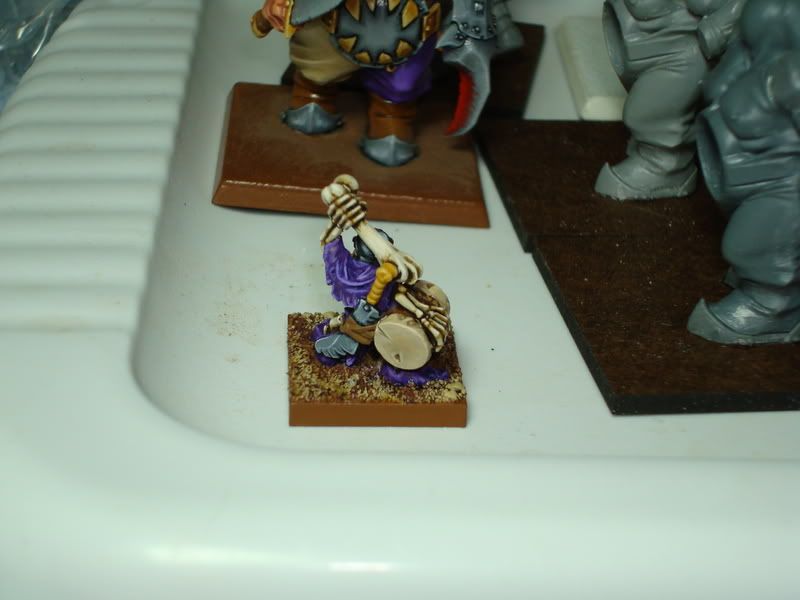
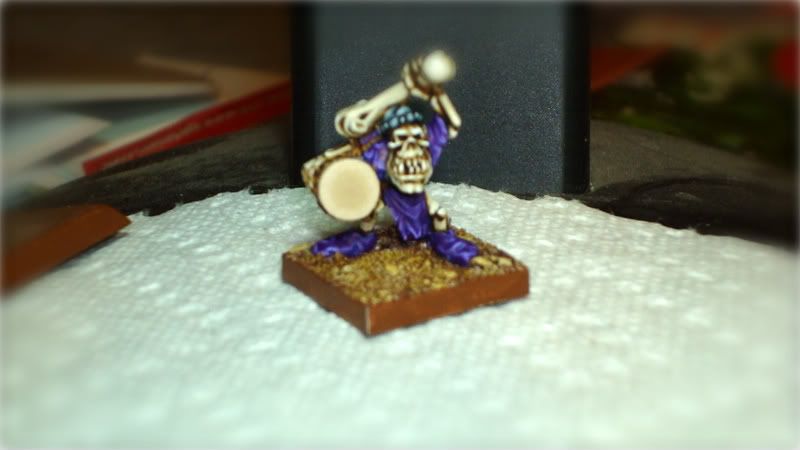
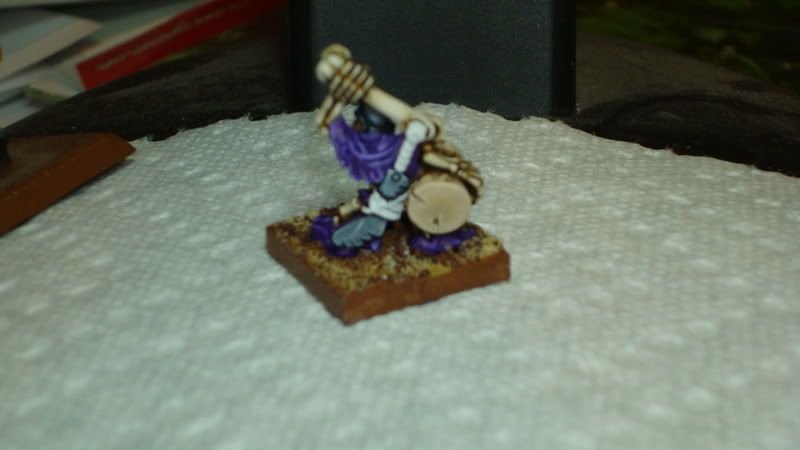
Sunday, May 31, 2009

Monthly Update: Painting Points

The month of May went by in a flash. While it feels like I have been painting all month, the actual points earned don't really reflect what I accomplished.


Last Month's Total: 20 Points

Points Earned in May: 3 Points

Total Points in 2009: 23 Points


Next month looks to be a big month for points. I have a number of models that have been in process that should be completed. More exciting is that in June, the first incarnation of the embodiment of the Emerald Eye will be finished.

If you would like to see the original post about Painting Points, check out the following link.


Special Thanks to Lone Pilgrim for introducing such a fun idea to the 40K blogsphere.

Saturday, May 30, 2009

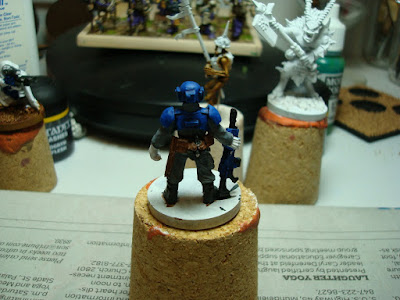
On the Bench: Imperial Guardsman

I am back to the drawing board with regards to how I will compose my Imperial Guard army. In my prior posts I talked about what I was hoping to build based on individual unit stories and concepts that match the theme of my army when paired with my buddy Ernie’s army. Using those earlier writings as a foundation, and based on what I have painted so far, this is what I think I know as fact for what will be in my army.

Elite – Ratlings (3) 30 pts
Elite – Ogryns (4)170 pts
Troop – Infantry Platoon
-Platoon Command Squad w/ medic and commissar 115 pts
-Infantry Squad 50 pts
-Infantry Sqaud 50 pts
-Heavy Weapons Squad w/ 3 heavy bolters 75 pts
Troop – Veteran Squad w/ Gunnery Sergeant Harker, 3 sniper rifles, heavy bolter, and forward sentries doctrines 180 pts
Troop – Veteran Squad w/ 2 flamers, 1 heavy flamer, and chimera w/ hull/turret flamers 155 pts
Total Points 825 points

This list looks more realistic at the moment since I own all of models listed already and don’t need to purchase anything else until after I complete the list. I have some options for the HQ slot, but haven’t decided on what I will do for the mandatory unit at this point. (I am shying away from the commissar lord at this point.)

Back to finishing the model...

The barrel of the gun was completed using the same color scheme as my grey knight terminator from March.
Vallejo Black Grey (70862)(3:1, paint:thinner) [Size 1 American Painter]
Black GW Wash
Black Grey (4:1, pain:thinner)
Black Grey/Vallejo London Grey (836) (2:1:1:1, black grey:london grey:thinner:glaze)
Black Grey/London Grey (1:2:1:1, black grey:london grey:thinner:glaze)
Black Grey/London Grey (1:3:1:1, black grey:london grey:thinner:glaze)
London Grey (4:1:1, london grey:thinner:glaze)
London Grey/Light Grey (70990) (4:1:1:1, london grey:light grey:thinner:glaze)

The base was a couple coats of terra earth (3:1, paint:thinner)


Weekly Update: Online Contest

DAKKADAKKA 'Get Your Teach On!'

THE RULES:
1) Your Tutorial thread must be posted in the Dakka Painting and Modeling Tutorials forum (this one) during the month of May.
2) All of the tutorial content (text, images, videos, etc) must have been created by you and may not have already been displayed as a tutorial elsewhere on Dakka or any other website. Tutorials found to have been posted elsewhere or that contain someone else's work will be disqualified.
3) The tutorial must actually be a tutorial about something pertaining to the wargaming hobby. It must include pictures and text explaining the different steps, and it must have different steps; just posting a beginning and ending picture of a model won't cut it!
4) All photos used for the tutorial MUST be hosted by Dakka (we don't want 'em disappearing a few months down the road). This can be most easily accomplished by uploading your photos to the Dakka Gallery. If you need any assistance uploading your pictures to Dakka (or how to link to your photos once you've uploaded them), feel free to post your questions in the Nuts & Bolts forum.
5) The day (or so) after the deadline, a thread will be created listing all of the qualifying tutorial threads along with a public poll for the community at large to pick their favorite tutorial from the bunch.
6) Public voting will last for 4 Days. At the end of which, the top five tutorials with the most votes in the poll are the finalists.
7) From the five finalists, a winner will be selected by a panel of judges. Judges will be selected by the site's administrator (me).
8) Admin and Mod participants can't become finalists or win the prize, but don't let that keep you from voting for them! Defeating one another is more than enough of a reward for us... THE

DEADLINE: In order to qualify, all tutorial threads posted must follow the rules above and must be posted anytime during the month of MAY 2009.

THE PRIZE: The prize for this challenge is our biggest yet! It is £130 (GBP) in-store credit plus free world-wide shipping with one of Dakka's fantastic partners, WaylandGames.co.uk. That's nearly $190 in US currency worth of product!!! A tremendously huge THANK YOU has to go out to Dakka user the sponsors for this challenge, both WaylandGames.co.uk and Dakka user LBursley, who not only came up with the idea for this contest (just because he wants to see what amazing tutorials people can create) but also put up a tremendous amount of his own money as part of the prize!


Note: There will be no blog entry next week (06/06/2009) for the Weekly Online Contest Update. Please remember to check back starting on Monday to vote for your favorite entry in the TRoE: Attention! contest.

Friday, May 29, 2009

On the Bench: Imperial Guardsman

At this point in the process, the model is base coated or better except for the base. I am now working on the details. I begin this phase by painting the blue sections of the model. I begin with another coat of Dark Blue (4:1; paint:thinner). Once applied twice, I add a layer of Dark Blue/Skull White (dark blue:skull white:thinner; 8:1:2) along the edge. The last layer was a thinner line along the edge of Dark Blue/Skull White (dark blue:skull white:thinner; 4:1:1)


The next detail that I attacked was the eagle insignias. I decided to keep this simple as somewhere in the back of my head I kept thinking that I needed to be able to repeat this process many times before the army will be done.
Reaper Chestnut Gold (09073) (4:1, paint:thinner)
GW Sepia Wash
Palomino Gold (4:1, paint:thinner)
Buckskin Pale (4:1, paint:thinner)

Next Time: Let’s Wrap this Up!

Imperial Guard CoD Stratagems

GW has posted a set of Imperial Guard specific Cities of Death stratagems. This was a very nice surprise and is going to result in me heading to the store this evening and buying a new building for CoD as my way of showing that I support this move by GW. I hope with each new codex that we see more of these kind of updates.

Special Thanks to Reds8n and Warseer for originally posting this on their site.

Thursday, May 28, 2009

On the Bench: Imperial Guardsman

When it came to the skin tone for this model, I wanted to try the Reaper Tanned Skin triad. At this point, my experience with the Reaper line of paints is mixed. I like the quality and flow of the paints, but I have found the triads, with the exception of the gold triad, to be lacking when it comes to depth and end results. Realizing this, I decided to use the tanned skin triad with the fair skin triad, which I believed would give me the depth in range that I like with my models.

Note: With regards to today’s On the Bench, the charge on the camera was low, so I did not capture every layer applied. Therefore, I am going to list the palette range and just show the few photos that were taken during the process.

Tanned Shadow (9043) (4:1, paint:thinner)
Tanned Shadow:Tanned Skin (2:2:1, tanned shadow:tanned skin:thinner)
Tanned Skin (9044) (4:1, paint:thinner)
Tanned Skin:Tanned Highlight (2:2:1, tanned skin:tanned highlight:thinner)
Tanned Highlight (9045) (4:1, paint:thinner)
Tanned Highlight:Fair Shadow (2:2:1, tanned highlight:fair shadow:thinner)
Fair Shadow (9046) (4:1, paint:thinner)

In the palette range above, the first three layers are intended to be the shading. Once applied, the mix of tanned skin and tanned highlight are the base coat. I know I am not using the right term when I say that, but I cannot think of a better description or word at the moment. The final three layers are highlights.

These two pictures are after the shadow layers were applied.


This picture is after all the layers have been completed and the eyes were painted onto the model.


The eyes were done as follows:
Vallejo Game Colors Black (4:1; paint:thinner) This is the base coat for the eyes.
Vallejo Game Colors Skull White (4:1; paint:thinner) This is applied over the black, only leaving a small amount of black showing along the outside of the eyes.
Vallejo Game Colors Black (4:1; paint:thinner) This is a carefully placed round dot of black paint.

Next Time: I am feeling blue again…

Wednesday, May 27, 2009

On the Bench: Imperial Guardsman

I typically focus on one color range and complete it before moving to the next one. I believe I do this because it allows me to focus and not feel so scattered while painting. With this model, I have decided to try and basecoat the model first and then do all of the highlighting.

Bestial Brown/Scorched Brown (3:2:2:2, Bestial Brown:Scorched:Glaze Medium:Thinner) This is the base coat for the brown leather sections of the model.
This layer was applied twice.


London Grey/Black Grey (4:2:2, London Grey:Black Grey:Thinner)After the brown coat, I decided that I wanted the boots to be the same color as the ones worn by my ogryn model from last month.


Badab Black (1:4, badab black wash:thinner) This wash was applied selectively. Once dry, I hit some of the deepest spots with a straight wash of badab black.


Tuesday, May 26, 2009

On the Bench: Imperial Guardsman

I have decided that the first group of Imperial Guard that I will paint is a very boring squad of them all in the same position. Sounds boring, but I am running with the theory that the repetition in painting will allow me to become comfortable with painting them and allow me to complete a unit of them more quickly. My choice of models for this project is the limited edition Cadian models that were released a few years ago. I was trading for them back when they were released and now seems like a good time to clean and paint them.


Once the dark blue has been applied and washed, I apply a coat of black grey (4:1, paint:thinner) and give it a wash of GW black.
Next Time: Something other than blue.

Saturday, May 23, 2009

Weekly Update: Online Contest

The Realms of Equinox Presents
Attention!


The Rules

1. Models MUST be Games Workshop. They may be heavily converted, but it must be clear that they are primarily composed of GW models/bitz. FW models may be used.
2. Entries must be a ten man squad of imperial guardsmen. The squad must be legal per the new codex.
3. You must be a follower of “The Realms of Equinox” prior to submitting an entry.

4. Entries must be painted between May 2, 2009 – May 29th, 2009. Proof of work will be required as part of the submission process (see below).
5. Submissions will be accepted between May 2, 2009 – May 29th, 2009. This gives you plenty of time to build/paint your entry. Minimum of 2 Photos will be required of your entry: Work in Progress showing the unpainted models on the new codex, and a completed work. The completed picture file can contain multiple pictures, but only one picture file will be posted per entry. The deadline for submissions will be May 29th, 2009 11:59 PM CST. To submit your photos, please email them to: equinox999equinox@yahoo.com
6. All completed submissions may not appear on any other site or blog before June 15th, 2009. Works in progress may be posted on other sites and blogs before June 15th, 2009. (This is to encourage people to talk about their creations and build excitement around the contest) Any entries found to be violating this rule will be banned from the contest.
7. Voting will be done by the readers of “The Realms of Equinox”. Photos will be placed on the blog and each follower will get to vote for their favorite entry. Voting will take place between June 1st, 2009 – June 12th 2009.
8. The winner will be announced on June 15th 2009. The Winner of the contest will receive their choice of either the new Imperial Guard Cadian Command Squad or Imperial Guard Catachan Command Squad. (Note: The prize will ship directly from the online provider, to save cost on shipping. If the winner is International, please allow extra time for the prize to arrive.)
9. If you have any questions, please post them in the comments section of this blog entry.

DAKKADAKKA 'Get Your Teach On!'

THE RULES:
1) Your Tutorial thread must be posted in the Dakka Painting and Modeling Tutorials forum (this one) during the month of May.
2) All of the tutorial content (text, images, videos, etc) must have been created by you and may not have already been displayed as a tutorial elsewhere on Dakka or any other website. Tutorials found to have been posted elsewhere or that contain someone else's work will be disqualified.
3) The tutorial must actually be a tutorial about something pertaining to the wargaming hobby. It must include pictures and text explaining the different steps, and it must have different steps; just posting a beginning and ending picture of a model won't cut it!
4) All photos used for the tutorial MUST be hosted by Dakka (we don't want 'em disappearing a few months down the road). This can be most easily accomplished by uploading your photos to the Dakka Gallery. If you need any assistance uploading your pictures to Dakka (or how to link to your photos once you've uploaded them), feel free to post your questions in the Nuts & Bolts forum.
5) The day (or so) after the deadline, a thread will be created listing all of the qualifying tutorial threads along with a public poll for the community at large to pick their favorite tutorial from the bunch.
6) Public voting will last for 4 Days. At the end of which, the top five tutorials with the most votes in the poll are the finalists.
7) From the five finalists, a winner will be selected by a panel of judges. Judges will be selected by the site's administrator (me).
8) Admin and Mod participants can't become finalists or win the prize, but don't let that keep you from voting for them! Defeating one another is more than enough of a reward for us... THE

DEADLINE: In order to qualify, all tutorial threads posted must follow the rules above and must be posted anytime during the month of MAY 2009.

THE PRIZE: The prize for this challenge is our biggest yet! It is £130 (GBP) in-store credit plus free world-wide shipping with one of Dakka's fantastic partners, WaylandGames.co.uk. That's nearly $190 in US currency worth of product!!! A tremendously huge THANK YOU has to go out to Dakka user the sponsors for this challenge, both WaylandGames.co.uk and Dakka user LBursley, who not only came up with the idea for this contest (just because he wants to see what amazing tutorials people can create) but also put up a tremendous amount of his own money as part of the prize!

Jawaballs: First Contest

First:Register for my blog as a follower. The link is to the top left on my blog. Click the "Follow" button and sign up. It should take you 1 minute and most of you should already be followers already.

Second:Go to www.rogue-market.com and become a registered subscriber on their boards as well. That should take you another minute.

Third:Having subscribed to both of the sites, you need to post on them. Begin here by commenting on this post. In your comment simply write your jawaballs blog name, and your Rogue Market name, as well as which model and box set you desire. Then go back to www.rogue-market.com and find my give away thread over there and do the same thing! Make a comment and write your jawaballs blog name, and your rogue market name, as well as the loot you desire. Thats it! The lucky winner will be ONE person, who has completed all three tasks.

The winner will be decided at the end of May.

The 25mm Warrior
The Funny Caption Contest


1. This contest is only for "From The Warp" and "Bell of Lost Souls" community members. If your not a member very sorry (you should become one anyway). If it comes out in the sauce a non member submitted a caption it will not count.
2. No making fun of other captions in submissions.
3 Keep it clean. This contest is in full compliance with the high standards set out in the "From the Warp" web site. If in doubt ask yourself "What Would Ron Do?"
4. If I personally know you your automatically disqualified (sorry Opiewan)
5. Have fun guys!!!

The Prize: A Death Korp Command Squad


After this week, I will be implementing a change to the Weekly Online Contest Update. As of late, I have been receiving emails asking if I can post blog entries that are not really contests as I would define them. Therefore moving forward, only contests that have an actual prize and are open to everyone will be posted in the weekly roundup.

Wednesday, May 20, 2009

On the Bench: Amethyst Veil (Retro Blog)

Making a Movement Tray

With one skeleton finished, I knew I was going to need something to start moving the unit around once I started painting them. While wandering Hobby Lobby with my family, I realized that I could make a movement tray using the basswood that was sold there. Now I am not claiming this was an original idea, I am certain I have read it here and on other sights, but until this moment, I hadn’t considered it. Now with the basswood staring at me, and at such a cheap price, I decided to give it a shot.

Materials
3/32” x 4” x 24” – Basswood (2.58 @ Hobby Lobby)
5/32” x 5/32” x 24’ – Basswood (0.53 @ Hobby Lobby)
Elmers Wood Glue (1.99 @ Hobby Lobby)
Sanding Block (3.99 @ Menards)
Exacto Knife (2.99 @ Menards)
Dremel w/ saw & sander attachments (Free @ Christmas)


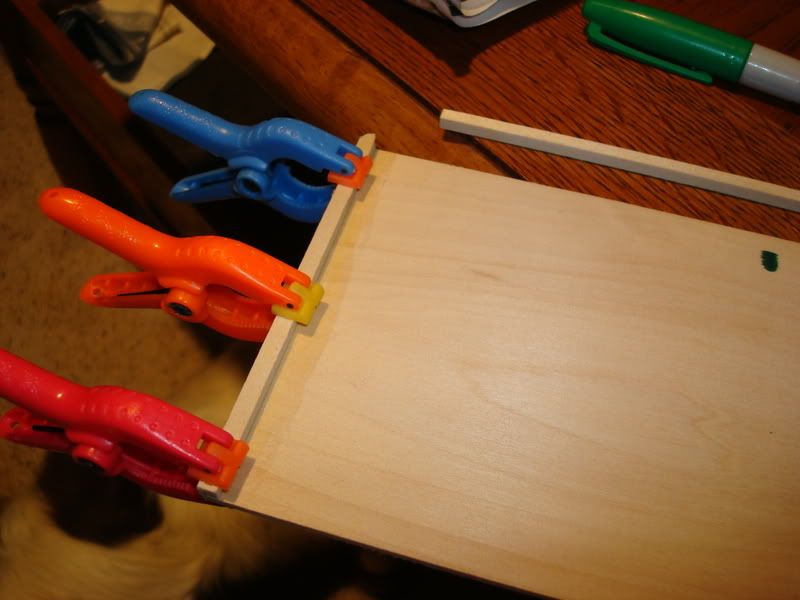
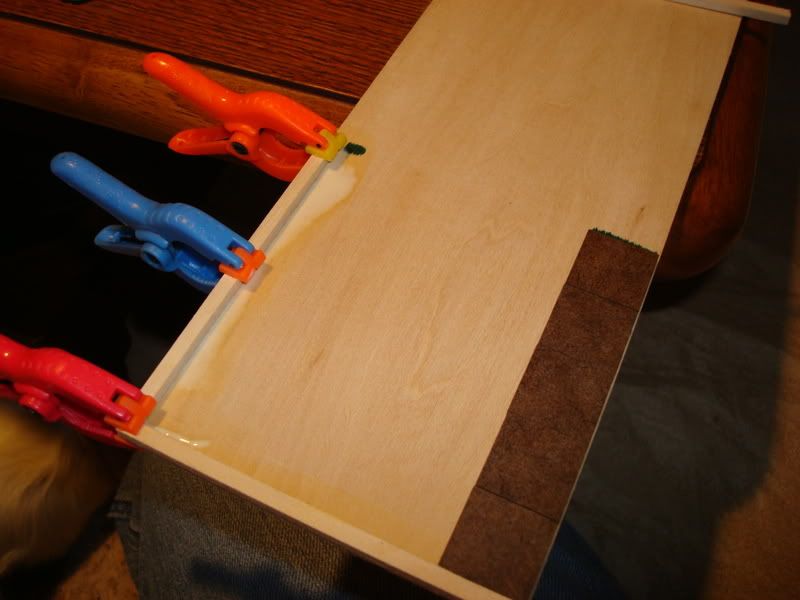
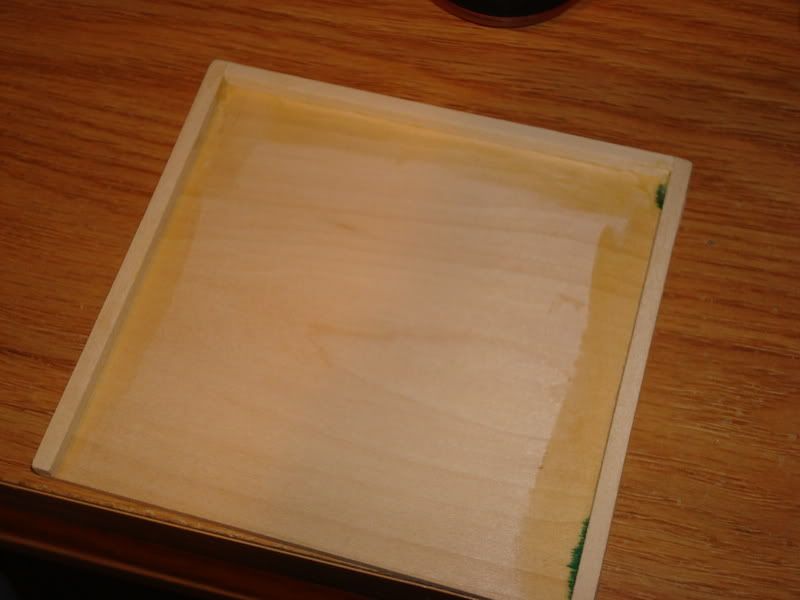
To start the process, I glue the edging to one side of the flat basswood using Elmers Wood Glue. I then use some clamps to keep the edge in place while the glue dries. Once the glue is dry, I slice the basswood edging using a hobby knife. With the one edge complete, I proceed to add the next one which will be the front of the tray using the same process. After that, I measure the width of the tray by using actual bases and marking the wood with a marker. In this case, the tray is going to be five models wide. With the tray marked, I add the last edge using the same process. Once the glue is dry, I use the dremel to remove the bottom of the tray by cutting against the one edge. With the excess remove, I start to sand the tray with a dremel then switch to a sanding block for the final step.

Photobucket
Photobucket
Photobucket

I plan to return to the tray after the skeletons are done so I can paint it and experiment with an idea I have for the army. So consider this topic to be continued.

Tuesday, May 19, 2009

Battle Report: Amethyst Veil vs Orcs

The First Battle in a War

Most Saturday mornings, GGage and I play a game in his den. Typically, these games are between 500 & 1000 points with me scrapping something together and GGage bringing a well painted horde of greenskins. During a recent one of these mornings, I decided to proxy the forces of the Amethyst Veil and give them a test drive.

The game was our standard, line up and kill each other scenario. We went through the process of placing the terrain, a series of chain fences and dwarven idols. With the board prepared, we placed our forces. My opponent for this battle had come packing a regiment of boar boyz, a large unit of night goblins, a decent size unit of savage orcs, a warboss I knew well, and two shamans. I had brought the Veil (2nd lvl mage, w/ Skeleton Summoning and +1 dispel staff), 2 units of 10 skeletons w/ full cmd, 5 black knights w/ musician/std, 6 cairn wraith w/ a banshee and a wight w/ the skeleton making sword.

At the beginning of the game, I rolled for my spells and received the Curse of Years (scary) and Raise Dead [not sure if that is the right name for the zombie summoning spell]. GGage rolled and got magic missile stuff (can you tell I am bitter about it). 8)

For those that want the quick recap, black knights died to a fanatic, cairn wraiths died to magic missiles and CR, vampire and 1 unit of skeletons died to savage orcs and the warboss, and the other unit of skeletons died to everything. In return, I killed one shaman and some night goblins.

The long version is I moved the wraiths and black knight forward at the start of the game. GGage did the same with his whole army. In the early magic phase, I nearly doubled one unit of skeletons and fixed the other. On turn two, GGgage moved his night goblins into 8” of the cairn wraiths, releasing his fanatics onto the populous. This had no effect on the cairn wraiths, but it foreshadowed trouble ahead. In the same turn, GGage called on the power of Gork and Mork to begin destroying my wraiths.

In return, I moved my cairn wraiths within range of his goblins and commanded the banshee to let out a bone chilling scream on the enemy. Obviously partially deaf from her own screaming, she rolled a 5 on the dice, which was useless against the leadership of the warboss inspired goblins.

In turn three, I watched as the fanatic found his way into the middle of my black knights. This resulted in a minor seven wounds on the units. The problem, I only had five knights. The turn also continued with more magic missiles, I am sure in a nice hew of green, blasting away on the wraiths, leaving me with three models at the start of my turn.

At this point in the battle, I could feel the tide of victory creeping further away from me. I moved the remaining wraiths into a few inches of one of his shaman and commanded the banshee to scream again. This time she had found her voice, and the shaman fell. I also moved the Veil into LOS so that he could attempt to curse the approaching savage orcs. His curse failed as the orcs clearly couldn’t understand the fact that they were even being cursed. It also helped that my opponent dumped all of his dispel dice into stopping the spell.

In turn four, the last of the wraiths were charged by the enemy and fell to the power of rank bonuses. At the same time, the skeleton core was hit by the savage orcs and warboss. This caused the unit to quickly crumble and fall.

In my turn, I charged the vampire into the savage orcs, and proceed to kill him. How was that for a plan! I also watch as the other unit of skeletons fail to recover from a fanatic that passed through them on the way to a party. Needless to say, at the end of this round, I was down to a few skeletons and a wight.

The last round was watching the skeletons and then the wight being surrounded and having their undead cards revoked.

Overall, it was a great game. I had a lot of fun and did enjoy what my army could do when it actually did it. I still like the theme and will continue with it, I may just proxy a few different units in future games.

Things that I learned from my defeat:
1. I expected the cairn wraiths to do more. Rolling a 5 (I originally quoted it as a 4) on the scream against the night goblins really hurt. Also, with all of the magic missiles that were hitting them, they didn't survive long.
2. The combination of the staff of sneak'n stealing and all the dispel dice from multiple goblin shamans, just shut down my magic phase. I had a good 1st turn with making more skeletons, but after that, I didn't do anything.
3. The fanatic hitting my black knights and doing so many wounds that the unit was wiped out was harsh.
4. Once the vampire dies, the game is over. Wasn't much I could do since I was short on units at that point.
5. The skeleton sword on the wight lord was useless, but that was cause I kept the skeleton units back expecting the wraith and knights to do the work.
6. My opponent had an overall game plan that worked against me. It was well thought out and executed. I didn't expect two shamans or the staff, so it was a smart play that really paid off. Hats off to him.

This Saturday, I plan on bringing the army again, this time with some more changes and a little more spice.

Vampire w/ Staff of Sorcery (+1 dispel), Skeleton Summoning VS, 2nd Magic Level VS (Hero/General)
Necromancer w/Invocation of Nehek & dispel scroll
Skeletons (10) w/ full command & std that doubles the unit size (Core)
Skeletons (10) w/ full command (Core)
Black Knights (5) w/ full command and barding (Special)
Cairn Wraiths w/ Banshee (6) (Rare)

I’d really like to do a proxy of an army built around skeletons and corpse carts with lodestones, but I will save that for another day.

As for work on the painting front, I am proceeding with the remaining skeletons and should have the first row of the unit ready for Saturday. I find that the rules I have set really slowed me down in terms of how much I can get done, but it has really helped with burnout. I have also been burning some hobby time playing with a skeleton horse and a grave guard model to make a black knight. The first try is decent and I may paint it up this weekend if I want a short distraction. (I know, I am breaking my own rules, but that is why they are there.)

Monday, May 18, 2009

On the Bench: Amethyst Veil (Retro Blog)

Turning Pewter into Gold

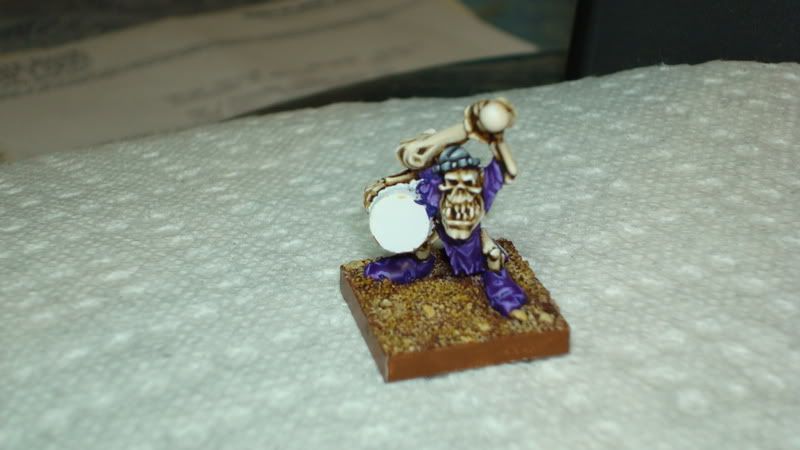
At this point in the process, I have two more color schemes to paint on the model, the gold hilt of the sword and the strips of cloth that are wrapped around the blade. I have a color scheme for the gold that I have been using on my ogres, so I figure that I should get that done on the model next.

(Note: I forgot my notebook, so I will need to post the color scheme for the gold at a later date.)
Photobucket
Photobucket
Photobucket
Photobucket
Photobucket

Upon completion of this step, I realize that the gold when on something like a weapon, lacks the depth of color that I felt I had when done on the gut plates of my ogres. That said, I plan for the moment to stick with the color scheme for the unit and attempt to improve upon in when I paint the lich. With that plan in mind, I am going to attempt to copy the color scheme used on a model that was recently posted by Unheilig. I really like the range of color used to paint the gold on that model and think it will look good with my armies color scheme. I’ll talk more about this when I get to work on the lich.

Back to the model, with the gold finished for now, I have the leather straps remaining on the model. For them I begin with a coat of charred brown (4:1 charred brown: thinner) and apply two coats using a 00 size brush. Next I mix charred brown and terra earth (3:1:1 charred brown: terra earth: thinner) and apply a coat over ~80% of the model using a 00 size brush. Next, I apply a coat of charred brown and terra earth in a 50/50 mix (2:2:1 charred earth: terra earth: thinner). Next a highlight of charred brown and terra earth in a 25/75 mix (1:3:1 charred brown: terra earth: thinner). Last, a straight highlight of terra earth (4:1 terra earth: thinner, 10/0 size brush).

With the model painted, I apply a few coats of bestial brown to the edge of the base, cleaning up the parts of the base that were wiped off while painting the model. If you have oily skin, like myself (GROSS!), I just give the model a gentle wipe with a hot cloth with a little soap on it. This removes the oil that may have collected on the model while painting it.

Next Time: Serving a unit of skeletons

Saturday, May 16, 2009

Weekly Update: Online Contest

The Realms of Equinox Presents
Attention!


The Rules

1. Models MUST be Games Workshop. They may be heavily converted, but it must be clear that they are primarily composed of GW models/bitz. FW models may be used.
2. Entries must be a ten man squad of imperial guardsmen. The squad must be legal per the new codex.
3. You must be a follower of “The Realms of Equinox” prior to submitting an entry.

4. Entries must be painted between May 2, 2009 – May 29th, 2009. Proof of work will be required as part of the submission process (see below).
5. Submissions will be accepted between May 2, 2009 – May 29th, 2009. This gives you plenty of time to build/paint your entry. Minimum of 2 Photos will be required of your entry: Work in Progress showing the unpainted models on the new codex, and a completed work. The completed picture file can contain multiple pictures, but only one picture file will be posted per entry. The deadline for submissions will be May 29th, 2009 11:59 PM CST. To submit your photos, please email them to: equinox999equinox@yahoo.com
6. All completed submissions may not appear on any other site or blog before June 15th, 2009. Works in progress may be posted on other sites and blogs before June 15th, 2009. (This is to encourage people to talk about their creations and build excitement around the contest) Any entries found to be violating this rule will be banned from the contest.
7. Voting will be done by the readers of “The Realms of Equinox”. Photos will be placed on the blog and each follower will get to vote for their favorite entry. Voting will take place between June 1st, 2009 – June 12th 2009.
8. The winner will be announced on June 15th 2009. The Winner of the contest will receive their choice of either the new Imperial Guard Cadian Command Squad or Imperial Guard Catachan Command Squad. (Note: The prize will ship directly from the online provider, to save cost on shipping. If the winner is International, please allow extra time for the prize to arrive.)
9. If you have any questions, please post them in the comments section of this blog entry.

DAKKADAKKA 'Get Your Teach On!'

THE RULES:
1) Your Tutorial thread must be posted in the Dakka Painting and Modeling Tutorials forum (this one) during the month of May.
2) All of the tutorial content (text, images, videos, etc) must have been created by you and may not have already been displayed as a tutorial elsewhere on Dakka or any other website. Tutorials found to have been posted elsewhere or that contain someone else's work will be disqualified.
3) The tutorial must actually be a tutorial about something pertaining to the wargaming hobby. It must include pictures and text explaining the different steps, and it must have different steps; just posting a beginning and ending picture of a model won't cut it!
4) All photos used for the tutorial MUST be hosted by Dakka (we don't want 'em disappearing a few months down the road). This can be most easily accomplished by uploading your photos to the Dakka Gallery. If you need any assistance uploading your pictures to Dakka (or how to link to your photos once you've uploaded them), feel free to post your questions in the Nuts & Bolts forum.
5) The day (or so) after the deadline, a thread will be created listing all of the qualifying tutorial threads along with a public poll for the community at large to pick their favorite tutorial from the bunch.
6) Public voting will last for 4 Days. At the end of which, the top five tutorials with the most votes in the poll are the finalists.
7) From the five finalists, a winner will be selected by a panel of judges. Judges will be selected by the site's administrator (me).
8) Admin and Mod participants can't become finalists or win the prize, but don't let that keep you from voting for them! Defeating one another is more than enough of a reward for us... THE

DEADLINE: In order to qualify, all tutorial threads posted must follow the rules above and must be posted anytime during the month of MAY 2009.

THE PRIZE: The prize for this challenge is our biggest yet! It is £130 (GBP) in-store credit plus free world-wide shipping with one of Dakka's fantastic partners, WaylandGames.co.uk. That's nearly $190 in US currency worth of product!!! A tremendously huge THANK YOU has to go out to Dakka user the sponsors for this challenge, both WaylandGames.co.uk and Dakka user LBursley, who not only came up with the idea for this contest (just because he wants to see what amazing tutorials people can create) but also put up a tremendous amount of his own money as part of the prize!

Jawaballs: First Contest

First:Register for my blog as a follower. The link is to the top left on my blog. Click the "Follow" button and sign up. It should take you 1 minute and most of you should already be followers already.

Second:Go to www.rogue-market.com and become a registered subscriber on their boards as well. That should take you another minute.

Third:Having subscribed to both of the sites, you need to post on them. Begin here by commenting on this post. In your comment simply write your jawaballs blog name, and your Rogue Market name, as well as which model and box set you desire. Then go back to www.rogue-market.com and find my give away thread over there and do the same thing! Make a comment and write your jawaballs blog name, and your rogue market name, as well as the loot you desire. Thats it! The lucky winner will be ONE person, who has completed all three tasks.

The winner will be decided at the end of May.

Thursday, May 14, 2009

On the Bench: Amethyst Veil (Retro Blog)

Dancing to the Beat of a Different Drum

I don’t know if there is a formal name for the condition I am about to describe, but I do know I suffer from it. The condition I speak of is a kind of fear that grips me when I am nearing the completion of a model and I only have a few sets of colors left to complete. It always seems that I am more critical of that last part of the work than the earlier stages. In this case, as I reach the completion of the model, I begin to worry that I really don’t have an idea how to paint the skin on the drum. I kind of have an idea how I want it to look, but I’m still not sure if I should be painting it outward or inward from the center. Not wanting to waste days worrying about it, I decide to go outward from the center and use a palette based on terra earth and khaki.

4:1 terra earth: thinner, 0 size brush
2:2:1 terra earth: khaki: thinner, 0 size brush
4:1 khaki: thinner, 00 size brush
3:3:2 khaki: dark sand: thinner, 00 size brush
3:3:2:1 khaki: dark sand: skull white: thinner, 00 brush size
2:2:2:1 khaki: dark sand: skull white: thinner, 00 brush size
1:1:4:2 khaki: dark sand: skull white: thinner, 00 brush size

The reason I use dark sand with the khaki is that I found it lightens the khaki color without bleaching it out like a straight mix of khaki and skull white. The end result was okay, I am not sure I really like it. The good thing is that this is the only model that was using this color scheme (i.e. has a drum), so I can change it later without having to redo a large number of models.

Photobucket
Photobucket

Monday: Finding gold

Wednesday, May 13, 2009

On the Bench: Amethyst Veil (Retro Blog)

Heavy Metal

Before I roll into the next step of the project, I wanted to mention a change I made to the project plan. It’s not a major change, but it was one that I thought I should make so I can be ready to play at least in part come May. The change was to swap the cairn wraiths with the second unit of skeletons in the plan. With the change, I now anticipate that I will have a fully painted warband ready in time for the next season of the league.

The revised project plan
Skeletons (10) w/ full command [CCC]
Lich
Cairn Wraiths (4)
Skeletons (10) w/ full command
Wight King
Grave Guard (10) w/ full command
Vespero’s Vendetta (5)


Something to Ponder: As I write today’s post and think about the changes I am making to the project plan, I came to wonder what would be the use of a vampire with the ethereal power. There are only two units that he can join, ghosts (you know what I mean *wink*) and cairn wraiths, and unless the vampire is a lord, it will not have any additional vampire powers. I thought maybe a lord with the power plus the additional magic levels and one of the summoning powers (hint: skeletons) parked in a unit of cairn wraith to protect it, but that seems like a waste. So has anyone come up with a good use for the power?

For today’s painting, I assault the metal portions of the model. You may have caught in yesterday’s picture a preview of the color scheme, so I’ll recap it here and just talk about my challenges and reasons for using it.

Chaos Black (4:1 chaos black: thinner)
Chaos Black: Black Grey (3:3:2 chaos black: black grey: thinner)
Black Grey (4:1 black grey: thinner)
Black Grey: London Grey (3:3:2 black grey: london grey: thinner)
London Grey (4:1 london grey: thinner, 00 size brush)
London Grey: Light Grey (3:3:2 london grey: light grey: thinner)
Light Grey (4:1 light grey: thinner)
Light Grey: Skull White (2:2:1 light grey: skull white: thinner)

There are a few reasons for using the color scheme above to represent steel metallics. The first reason is I like the ‘cartoon’ look on my WFB models. If I were to compare this with video games, I would say I like the look of Super Smash Brothers Brawl over the look of Gears of War (Just talking artistic vision and not gameplay or story). Second, I don’t want to have to deal with the drawbacks of working with metallics. Don’t get me wrong, I like the look of them, as I have used them extensively with certain 40K armies, but you need to be careful with which brushes you use and need to make sure you really clean your painting supplies before switching from metallics to non-metallics, otherwise you may get the glitter effect.

Photobucket
Photobucket
Photobucket

Next Time: Beating my drum.

Tuesday, May 12, 2009

On the Bench: Amethyst Veil (Retro Blog)

It’s the Clothes that Make the Skeleton

Sometimes you realize your mistakes only after you can’t correct them. In this cause I decided to break with doing the models in parts and assemble a few complete skeletons so I could get a better feel for the models. This may sound weird, but I purchased the new skeletons from a dealer on Ebay that ships the sprues without the box. Since I don’t pick-up WD, I didn’t have many images of how the models look once completely assembled. That said, I put together a real basic skeleton with a spear, which I really liked. This prompted me to assemble another with armor, a big helmet, and a large pointy sword. For those following along, that is where I made the mistake. Only after letting the plastic glue dry, GW brand by the way, I realized that there were places on the model that may be quite difficult to reach with a paint brush that is not curved in the shape of a ‘S’ and about a size 36/0.

Photobucket
Photobucket

Moving back to actual painting, with the bone completed, I decided it was time to tackle the clothes. All of my WFB armies have the color purple as one of their base colors. The reason for this is I like the color and it allows me to swap units using the DoW rules. That said, I wanted to work out a faster paint scheme than the one I have used in the past, since that scheme used mixing hexed purple and white and gradual layers. To reach this goal, I decided to use a Vallejo color called violet blue. It seems like a good fit into the scheme and looks like to would cut out a couple layers.

I begin the purple with a base coat of royal purple (4:1 royal purple: thinner) using a size 0 brush. I allow the first coat to dry before applying another coat. Once the second coat is applied, I begin to mix and apply a coat of royal purple/hexed lichen (3:3:2 royal purple: hexed lichen: thinner). I apply two coats of this color in thin, but rapid succession, thus giving an overall even coat. Next, I apply two coats of hexed lichen (4:1 hexed lichen: thinner, 00 size brush) in the same manner but leaving more of the last layer showing in the deepest crevices.

At this point, I take a break and let the paint dry for an hour. When I return, I begin to highlight using a mix of hexed purple and blue violet (2:2:1 hexed purple: blue violet: thinner). I apply two coats, the second one covering less area and being applied with a lighter touch. Next, I apply a layer of highlight using just blue violet (3:1 blue violet: thinner, 10/0 size brush). Last, I apply a layer of blue violet/skull white mix (3:3:2 blue violet: skull white: thinner, 10/0 size brush) for the final highlights.

Photobucket
Photobucket
Photobucket

Next Time: Working the forge.

Imperial Guard Project

As I have mentioned in the past, my friend Ernie and I are working on a joint Imperial Guard project. The idea is to build off of each other and work towards having a unified force for potential team tournaments in the distant future. Up to this point, we have been diving into the codex and developing ideas for our theme. At this point, I don’t want to reveal that theme, but I do feel like sharing potential units that may be included in my portion of the project. What I can say is my portion does not make a “typical” army as the flaws in the army are very intentional and clear. (Note to my readers: feel free to discuss these flaws in the comments section, as I am eager to babble about this project.)

The first unit I am looking at building is a veteran squad using Gunnery Sergeant Harker. The squad will be based on cadian models, so Gunnery Sergeant Harker will be a “count as” cadian version of the character/model. I visualize this unit to be the guys that sit outside the city’s gate and are ready to keep anyone from leaving through those gates.

Veteran Squad w/ Gunnery Sergeant Harker, 3 Sniper Rifles, 1 Heavy Bolter and the Forward Sentries Doctrine (180 pts)

When it came to designing the army, this was actually the first unit I wanted to build. The reason they are going to be the second unit (at this time) is that this unit will be the first unit that has a transport. Unlike the first unit, this one already has a name, “The Matchstick Boys”. As the name implies, this unit is all about burning stuff. The intention of this unit is to be my version of an urban cleansing squad. The Matchstick Boys are the crew sent into a city to clean up the rough parts.

Veteran Squad w/ 1 Heavy Flamer, 2 Flamers, and 1 Chimera w/ Turret/Hull Flamers (155 pts)

The next unit has already been revealed, but with the codex in hand, I can define what the “Nut Crackers” are going to look like on the board. I just love the idea of these guys, a group of cranky ogryns that have one goal, crack open anything they are ordered to crack open. Old Balls is the Bonehead of the crew, a veteran ogryn with an attitude like your momma! Sloppy Joe was a bodyguard for a low ranking commissar until he accidently killed him. Moo and Oink are new blood to the crew. Their nicknames coming from the sounds they make when sleeping. As a side note, I really wish these guys could have a commissar as a unit purchase. I had some fun ideas, but don’t want to burn the HQ slot on a commissar lord.

Ogryns (4 models) w/ Chimera w/ Turret/Hull Heavy Bolters (225 pts)

After this point in the project, I should have enough practice painting tanks that I will be comfortable painting a couple of Forgeworld models. This unit is currently nicknamed as the “Exterminators”, but I think I will search for something more original. The idea is that machinery and equipment is more important than human life, so Bane Wolves are used for extreme crowd control. I’ll be using the forgeworld Graia Pattern Hellhounds, as I like them the best of the currently available options.

Bane Wolves (2 Tanks) w/ Smoke Launchers (270 pts)

Every army must have a commander, and this one is no exception. The problem is whether or not I want to roll with a themed command squad or go with a commissar lord that is basically acting like a warden. To this end, I have decided for now that I will focus on a commissar lord, as I have one more unit at this point that I want to add to the army. I don’t know the back story on this guy, but he feels right at the moment. Maybe he will become the commissar that joins the Nut Crackers.

Lord Commissar w/ power weapon (80 pts)

The last unit is a bit odd, but again, it goes with the theme I am developing for this army. I am going with a cheesy name, but one that fits the model. “The Mechanic” will be a techpriest enginseer accompanied by some servitors. I will be using arco models instead of the servitor models, as I dislike the current servitor models.

Techpriest Enginseer w/ 3 servitors (90 pts)

Once the base 1000 points is finished, I will look at expanding the army further. In my next article, I will look at potential units that may make the army when I am ready to expand it to a solo army for 1500 point games.

Monday, May 11, 2009

On the Bench: Amethyst Veil (Retro Blog)

Look Daddy, I Can Do It.

One Fish, Two Fish…
Red Fish, Dead Fish…


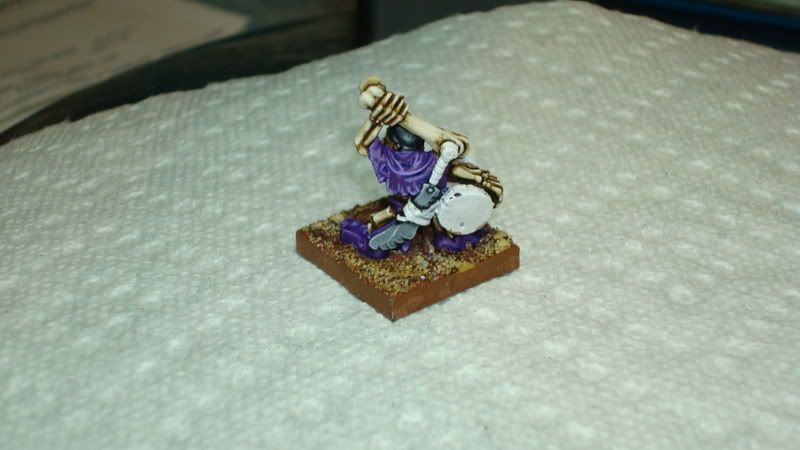
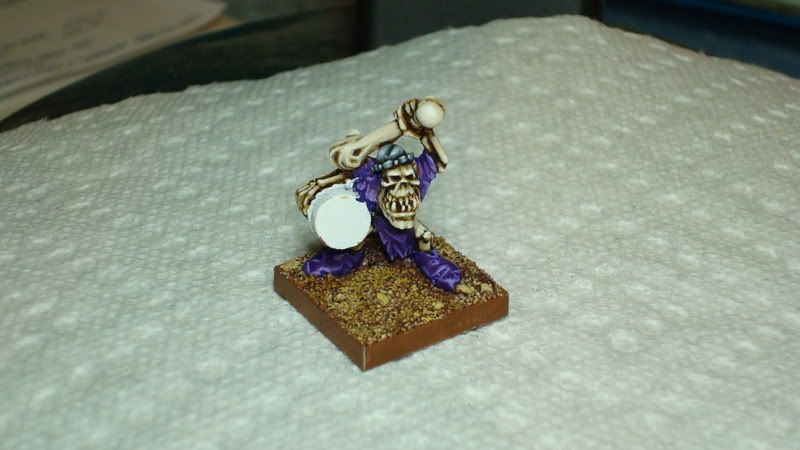
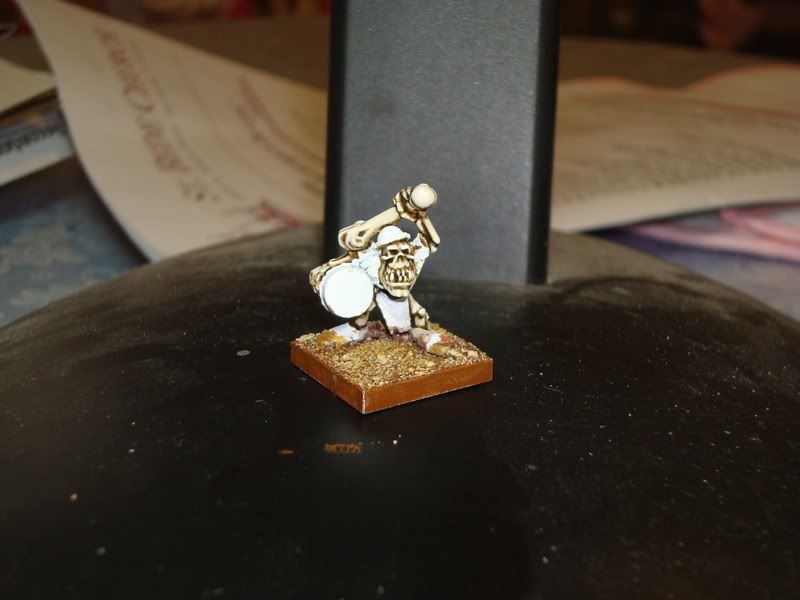
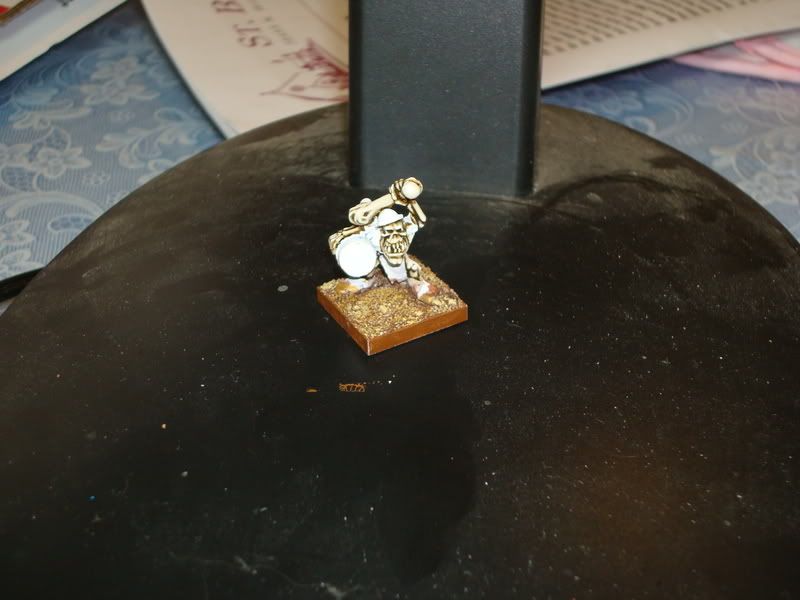
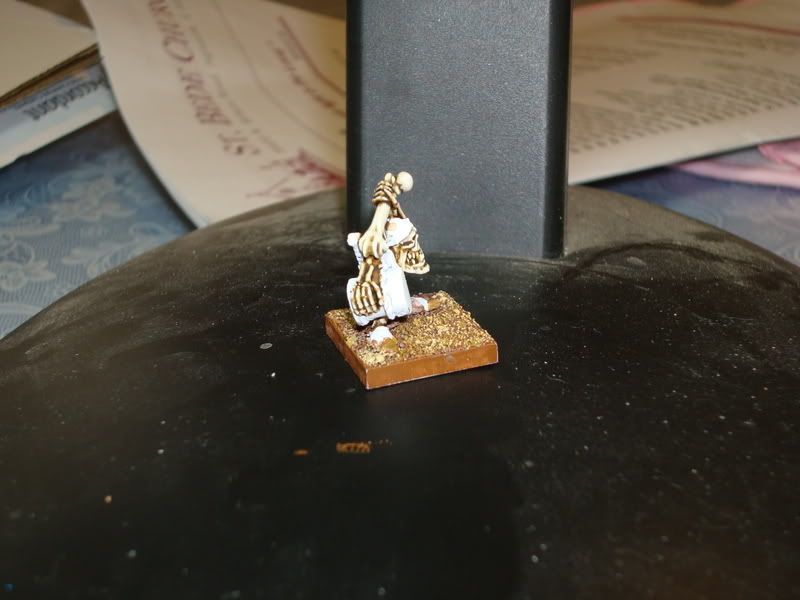
This project has started at a nice pace, and the first test of the bone scheme I am going to use has been successful. The next phase in the project, and completing the unit, is to complete one model with the complete color scheme to make sure it works for me. A lot of the actual palette for each color has already been decided as I want this army to blend with my other two, but I wasn’t sure as I began that the bone scheme would match-up well.

To begin this piece of the project, I needed to select a complete model. I decided to go with the musician from the Cursed Company as I could strip him if the paint job wasn’t what I was wanting. It was also a good test model for me as the model is packed tight so portions of it would be difficult to paint, thus completing it would feel like a reward to me.

Before I can prime the model, I needed to base it. For this project I have decided to use George Bases instead of the ones provided by GW. I like George Bases because they come in the same sizes as GW ones, are wood, thus heavier, and aren’t angled down the sides like GW bases, thus creating a more uniformed look when models are ranked up. The bad thing about George Bases, there is only one store I know of that carries them, Games Plus in Mount Prospect, IL.

I apply the model to the base using Elmer’s Super Glue (Gel). I like using this particular glue for a couple of reasons. One, it’s not runny, so I don’t normally glue myself to the model, though it does happen. (Actually it happens as often as me stabbing myself while cleaning models, and that happens more often than I care to admit.) Two, if I make a mistake, acetone removes the glue pretty easily.

Once the glue was dry, I proceeded to coat the base in Elmer’s glue, the white stuff, using a garbage brush to spread it evenly across the surface. Next, I dipped the model in a bowl of fine sand. Since dipping the sand causes the glue to shift and stick some of the sand to the sides of the base, I use another base to clean and makes sure no sand is hanging over the edges. With that done, I set the model aside to dry and work on cleaning more skeleton parts till the timer goes off.

The next day, I take the model out to the garage and give it a few light coats of white primer. I then let it sit for the remainder of the day and focus on other non-hobby activities.

Moving on to the next day, I start the model by painting the base. I first cover the base with a thinned coat of charred brown (4:2 charred brown: thinner). I then wait a few minutes, using the time to clean another spear, and proceed to give the base another coat. Once the second coat is applied, I let the model sit again till it dries. Once dry, I next drybrush a coat of dark flesh (4:1 dark flesh: thinner). This was followed by two layers of bestial brown (4:1 bestial brown: thinner) drybrushed and than a few layers of bleached bone (4:1 bleached bone: thinner) drybrushed. At that point, the bell rung and the round was over.

With the base painted, I proceed to paint the bone portions of the model using the color scheme I decided on.

Bone Color Scheme
4:1 desert yellow: thinner, 0 size brush
3:1:4 brown ink: black ink: thinner, 00 size brush
4:1 desert yellow: thinner, 00 size brush
2:2:1 desert yellow: bleached bone: thinner, 10/0 size brush
4:1 bleached bone: thinner, 10/0 size brush
2:2:1 bleached bone: skull white: thinner, 18/0 size brush

CCC Musician p 2
CCC Musician p 1
CCC Musician p 3

Next Time: Picking out something for my skeleton to wear.

Weekly Update: Amethyst Veil

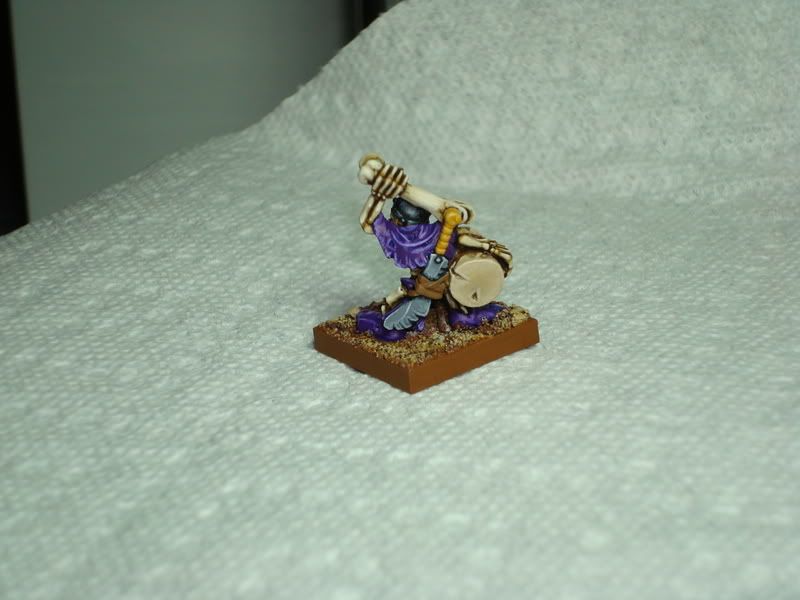
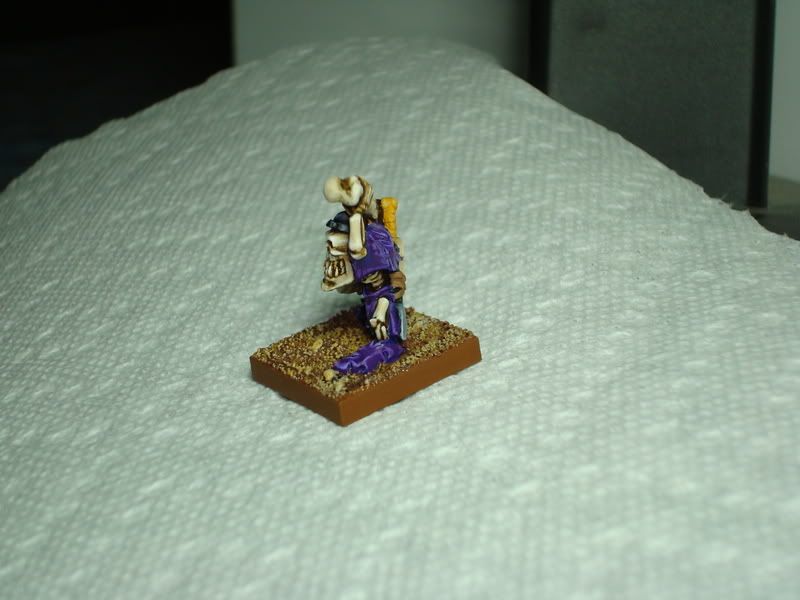
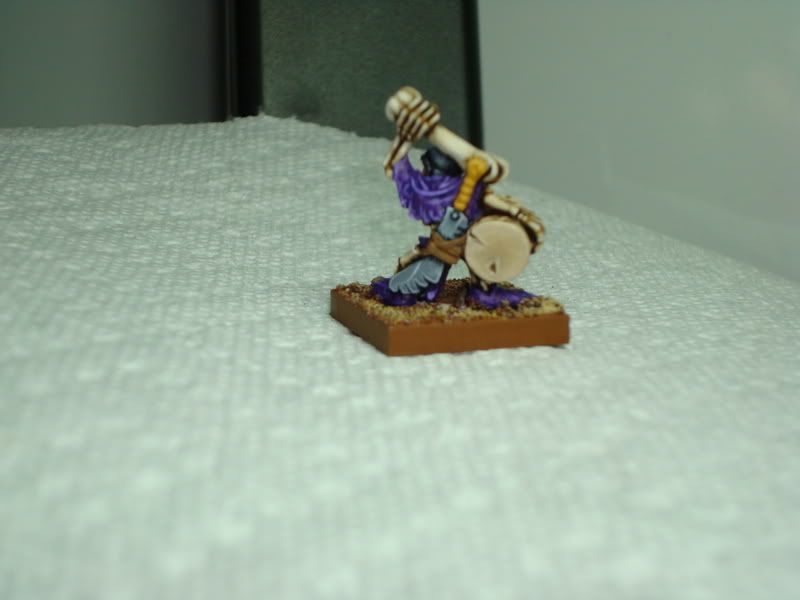
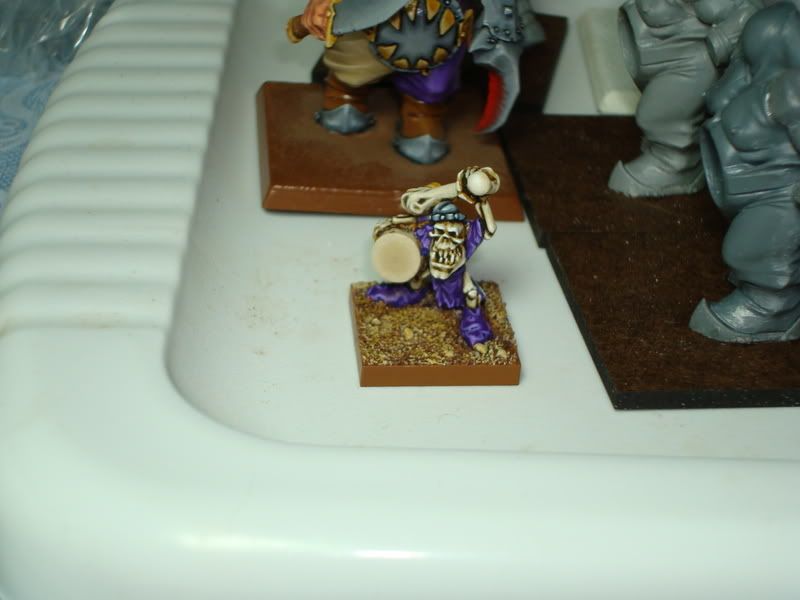
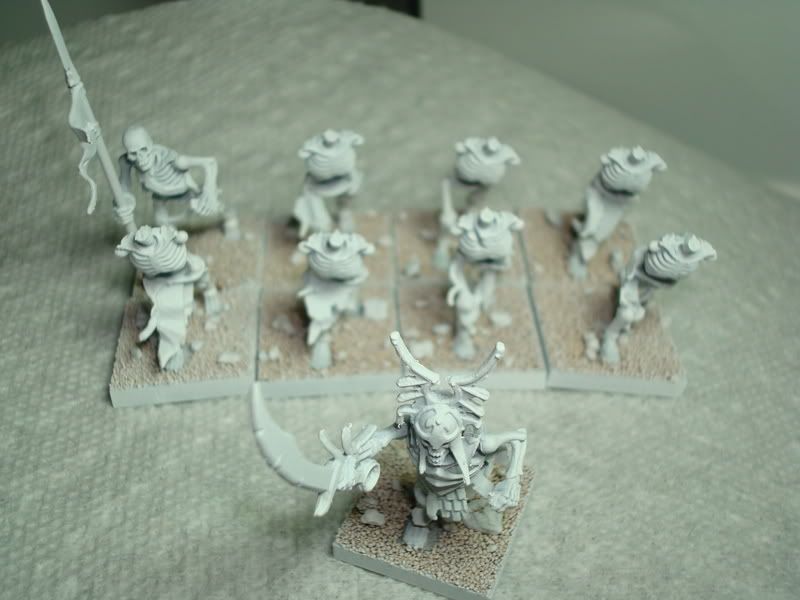
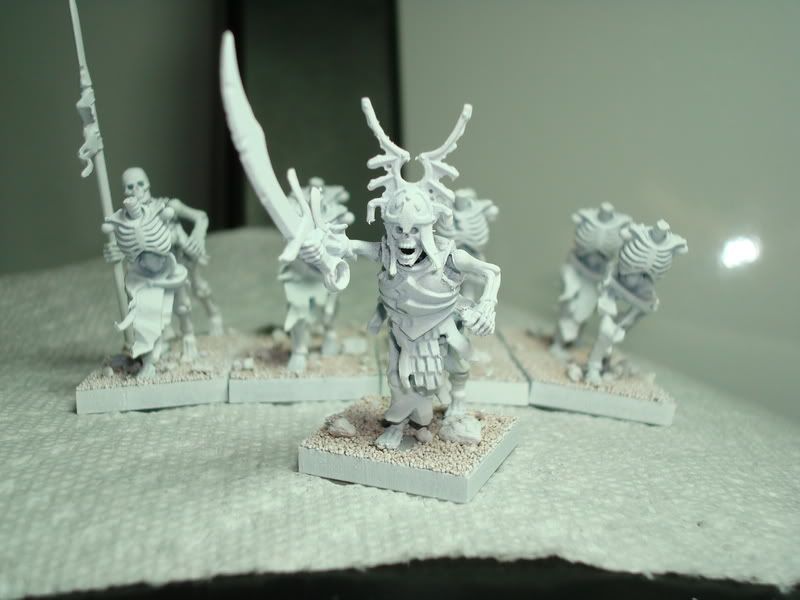
Yet more skeletons to the regiment. The newest ones were modeled to be without weapons or shields. The intention with doing this is to use them as raised skeleton for any skeleton units in the army. (It also makes painting them easier.)

Saturday, May 9, 2009

On the Bench: Amethyst Veil (Retro Blog)

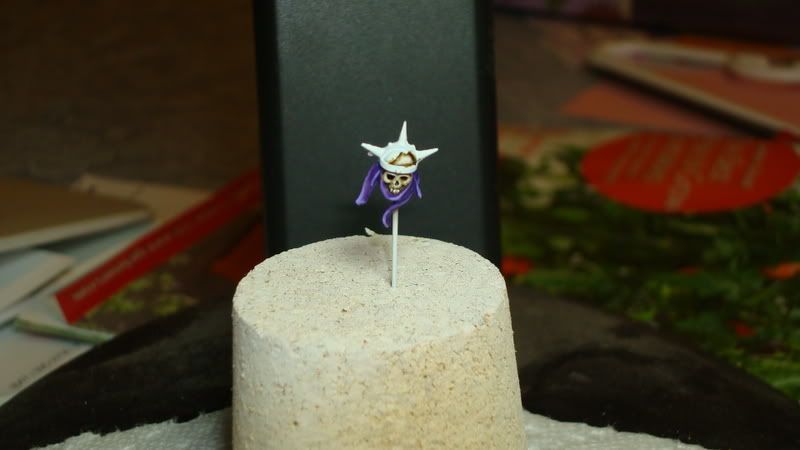
A Skeleton Head… On a Stick

Before I roll into today’s post, I just wanted to say thanks for all of the great feedback I have received.

It’s cool how a simple wash of brown & black ink can add so much depth to a model. Still though, there is that dreaded ink shine that I like on metallic paints but am not so happy about on my non-metal paints.

With the wash now very dry, I begin again by applying another coat of desert yellow (4:1 desert yellow: thinner) using a 00 size brush, this time not covering the deepest and most obscure parts of the model. At this point I think to myself that I should just go with that and move on. With a cry of pointless determination, I scream out ‘No’ and proceed with painting the skulls. [Wow, that is some bad writing, even for me] All stupidity aside, I do another coat of the color

Next, I give the model a coat of 2:2:1 desert yellow: bleached bone: thinner.

Next, I give the model a coat of 4:1 bleached bone: thinner, followed by a repeat of the coat.

The next step is painting a good portion of the model with two coats of a bleached bone/skull white mix. For this step I used a 10/0 size brush with a color mix of 2:2:1 bleached bone: skull white: thinner.

The last step in painting bone was an extreme highlighting with skull white. This was done only along the brow and a few other spots using an 18/0 size brush. The color was a 4:1 skull white: thinner mix. I did two coats, the amount of surface on the second coat slightly less than the first.

Photobucket
Photobucket
Photobucket

Next Time: Moving up to a whole model.

Weekly Update: Online Contests

The Realms of Equinox Presents
Attention!


The Rules

1. Models MUST be Games Workshop. They may be heavily converted, but it must be clear that they are primarily composed of GW models/bitz. FW models may be used.
2. Entries must be a ten man squad of imperial guardsmen. The squad must be legal per the new codex.
3. You must be a follower of “The Realms of Equinox” prior to submitting an entry.

4. Entries must be painted between May 2, 2009 – May 29th, 2009. Proof of work will be required as part of the submission process (see below).
5. Submissions will be accepted between May 2, 2009 – May 29th, 2009. This gives you plenty of time to build/paint your entry. Minimum of 2 Photos will be required of your entry: Work in Progress showing the unpainted models on the new codex, and a completed work. The completed picture file can contain multiple pictures, but only one picture file will be posted per entry. The deadline for submissions will be May 29th, 2009 11:59 PM CST. To submit your photos, please email them to: equinox999equinox@yahoo.com
6. All completed submissions may not appear on any other site or blog before June 15th, 2009. Works in progress may be posted on other sites and blogs before June 15th, 2009. (This is to encourage people to talk about their creations and build excitement around the contest) Any entries found to be violating this rule will be banned from the contest.
7. Voting will be done by the readers of “The Realms of Equinox”. Photos will be placed on the blog and each follower will get to vote for their favorite entry. Voting will take place between June 1st, 2009 – June 12th 2009.
8. The winner will be announced on June 15th 2009. The Winner of the contest will receive their choice of either the new Imperial Guard Cadian Command Squad or Imperial Guard Catachan Command Squad. (Note: The prize will ship directly from the online provider, to save cost on shipping. If the winner is International, please allow extra time for the prize to arrive.)
9. If you have any questions, please post them in the comments section of this blog entry.

DAKKADAKKA 'Get Your Teach On!'

THE RULES:
1) Your Tutorial thread must be posted in the Dakka Painting and Modeling Tutorials forum (this one) during the month of May.
2) All of the tutorial content (text, images, videos, etc) must have been created by you and may not have already been displayed as a tutorial elsewhere on Dakka or any other website. Tutorials found to have been posted elsewhere or that contain someone else's work will be disqualified.
3) The tutorial must actually be a tutorial about something pertaining to the wargaming hobby. It must include pictures and text explaining the different steps, and it must have different steps; just posting a beginning and ending picture of a model won't cut it!
4) All photos used for the tutorial MUST be hosted by Dakka (we don't want 'em disappearing a few months down the road). This can be most easily accomplished by uploading your photos to the Dakka Gallery. If you need any assistance uploading your pictures to Dakka (or how to link to your photos once you've uploaded them), feel free to post your questions in the Nuts & Bolts forum.
5) The day (or so) after the deadline, a thread will be created listing all of the qualifying tutorial threads along with a public poll for the community at large to pick their favorite tutorial from the bunch.
6) Public voting will last for 4 Days. At the end of which, the top five tutorials with the most votes in the poll are the finalists.
7) From the five finalists, a winner will be selected by a panel of judges. Judges will be selected by the site's administrator (me).
8) Admin and Mod participants can't become finalists or win the prize, but don't let that keep you from voting for them! Defeating one another is more than enough of a reward for us... THE

DEADLINE: In order to qualify, all tutorial threads posted must follow the rules above and must be posted anytime during the month of MAY 2009.

THE PRIZE: The prize for this challenge is our biggest yet! It is £130 (GBP) in-store credit plus free world-wide shipping with one of Dakka's fantastic partners, WaylandGames.co.uk. That's nearly $190 in US currency worth of product!!! A tremendously huge THANK YOU has to go out to Dakka user the sponsors for this challenge, both WaylandGames.co.uk and Dakka user LBursley, who not only came up with the idea for this contest (just because he wants to see what amazing tutorials people can create) but also put up a tremendous amount of his own money as part of the prize!

Jawaballs: First Contest

First:Register for my blog as a follower. The link is to the top left on my blog. Click the "Follow" button and sign up. It should take you 1 minute and most of you should already be followers already.

Second:Go to www.rogue-market.com and become a registered subscriber on their boards as well. That should take you another minute.

Third:Having subscribed to both of the sites, you need to post on them. Begin here by commenting on this post. In your comment simply write your jawaballs blog name, and your Rogue Market name, as well as which model and box set you desire. Then go back to www.rogue-market.com and find my give away thread over there and do the same thing! Make a comment and write your jawaballs blog name, and your rogue market name, as well as the loot you desire. Thats it! The lucky winner will be ONE person, who has completed all three tasks.

The winner will be decided at the end of May.

Friday, May 8, 2009

On the Bench: Amethyst Veil (Retro Blog)

Taking the First Steps

The first step can be the most difficult; it can also be the last.

There is much to say about one’s ability to stay focused. It’s a talent, and one I am not sure that can be taught as much as developed. (I feel like Confucius) That said, I needed to create for myself an environment that allowed me to gain that ability, if not fake it for the length of this project. If you read my first post, I provided a list of my goals and plans to accomplish that need, so I will refrain from going over it again. The point for now is that I have implemented the action plan.

The first unit on my plate is a skeleton unit that will stand in as the front of a Cursed Company RoR in addition to being a unit in a VC army. Since it has been awhile since I picked up a brush, I decided I needed to work out a color scheme for bone that was bright while easy to repeat and pretty resistant to color drift. When I say color drift, I mean when colors in an army drift as it is painted where the red in the beginning doesn’t match up perfectly with the red on the last unit. Good note taking and pictures can help a lot with this problem, especially if you take the time to capture each layer or couple layers.

With the skeletons, and all bones in my army, I wanted something that was based in brown and shifted to a bright off-white. This is not a difficult want as there are plenty of excellent tutorials out there on how to accomplish such a color range. In the end, I decided to borrow from one that was posted on the GW website and makes slight changes to fit using Vallejo paints and add a little depth.

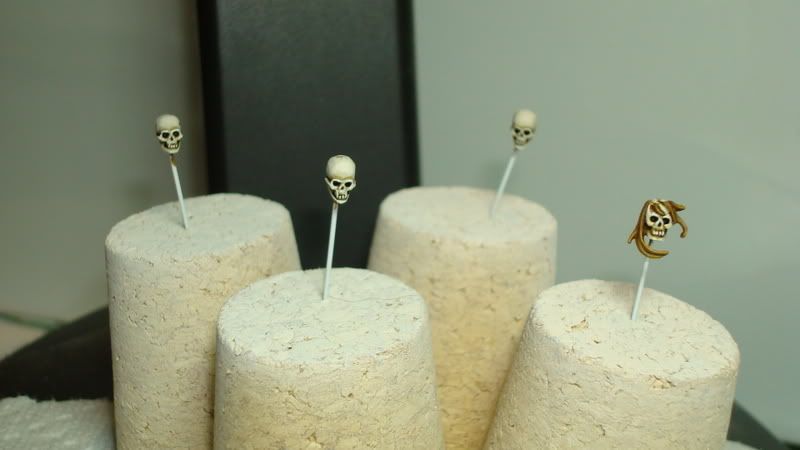
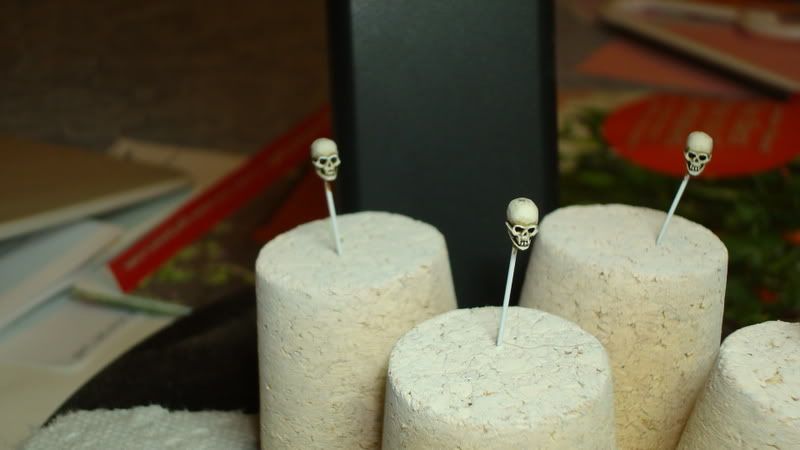
With the overall color scheme for bone decided, my next step was to work on a few test bones to get a feel for painting the new skeletons plus getting the details of the color scheme (i.e. coverage per layer, wrong colors, etc.) When it comes to painting, I like to use little model holders I have created from cork and pins. They help me work with the model without having to place my greasy hands all over it and ruining my work. They also allow me to work on the model in pieces when I feel that is the best way to paint it.

So I selected five heads, three generic skulls, one with hair and one with a helmet. The reason for the mix was I felt it would best represent how the majority of my army will look in terms of heads. (Wow, do I like to babble)

To begin, I am priming everything in white. As most of you know, white is the preferred primer if you want your colors to look bright, but it is also much more difficult to use as it is more obvious when it bleeds through other colors. Still though, I want these guys to be bright, so white primer was the only choice for me.

Next, I gave the models two thin coats of desert yellow. (4:1 desert yellow: thinner). I like to use an acrylic thinner instead of water, so I use Model Masters thinner.

Once the base coat has dried, which is usually within a few minutes, I mixed a wash of brown and black ink to cover the bone. (3:1:4 brown ink: black ink: thinner) I usually only use inks for metallic paints, but for this project I decided to give it a try and see how it works.

At this point, I have some waiting while the wash dries, so I decided to work on cleaning more bitz off the skeleton sprues. I get through cleaning the legs and torsos just as the stove calls time on the day.

[Due to technical difficulties, the pictures I took for the steps above were blurry, so I decided not to attach them. Instead, I am posting a promo picture for the next post. When I do my next batch of skeletons, I will put more pictures into this post]

Photobucket

Next Time: Why does your husband have a bunch of little heads on sticks?

Tuesday, May 5, 2009

Happy Birthday Paul

While this blog is dedicated to my activities and thoughts about the hobby, there are times when something more important to me than the hobby occurs that makes me want to include it in this blog. Today is one of those days.

Today is Cinco de Mayo. More importantly, today is my brother Paul’s birthday.

There are 8 ½ years difference between my brother and me. In a lot of ways, we are from two different generations. With such an age difference, one would think that we don’t share much in common, but that is not really the case. We do each have our own interests; he enjoys sports while I am into this hobby I write about weekly. These differences though are few and normally we find ourselves always returning to the same interests and discussions.

A conversation between us cannot go by where we don’t discuss the latest movies. Since we were young, both of us loved going to the movies. Till this day we still find ourselves going to most movies on opening weekend, though being a dad and the distance between my brother and I have limited the number of times we can do it together. My hope is that as my daughter gets older, she can join my brother and me in these discussions.

Like I mentioned, a difference between my brother and me is my interest in the hobby. This wasn’t always the case though, as there was a time when my brother was into it. Back in the days of 40K second edition, my brother and I would play in the basement of our parent’s home. My brother would play space marines, while I would field my eldar. We would paint our little men and set them up on the ping-pong table that had been converted into a game board. The basement was always cold and damp, but it didn’t seem to matter to us.

The games were always one sided, my much younger brother seeming to always have the edge on me. Now I could claim that it was a matter of me going easy on him, but to be honest, that was never the case. My brother was a smart kid, and knew how to play with the units he had on the board. I would set-up my dark reaper exarch with a powerfield and reaper launcher on a hill and hope to sniper his librarian and assault cannon armed terminators as they approached. The plan never worked, even when I changed my strategy. Again, I equate this to my brother’s ability to strategize and stick to the plan.

It is this ability to focus and stick to the plan that has allowed him to become the man he is today. I’d like to think that those times we spent playing games in the basement is what made him into who he is, but he would have become that man regardless of any silly games we played. To me though, those times will always be the best times I have ever had enjoying this hobby.

Happy Birthday Brother!

If you would like to check out some of my brother's amazing writing, head over to his site.

Saturday, May 2, 2009

Weekly Update: Online Contests

The Realms of Equinox Presents
Attention!


The Rules

1. Models MUST be Games Workshop. They may be heavily converted, but it must be clear that they are primarily composed of GW models/bitz. FW models may be used.
2. Entries must be a ten man squad of imperial guardsmen. The squad must be legal per the new codex.
3. You must be a follower of “The Realms of Equinox” prior to submitting an entry.

4. Entries must be painted between May 2, 2009 – May 29th, 2009. Proof of work will be required as part of the submission process (see below).
5. Submissions will be accepted between May 2, 2009 – May 29th, 2009. This gives you plenty of time to build/paint your entry. Minimum of 2 Photos will be required of your entry: Work in Progress showing the unpainted models on the new codex, and a completed work. The completed picture file can contain multiple pictures, but only one picture file will be posted per entry. The deadline for submissions will be May 29th, 2009 11:59 PM CST. To submit your photos, please email them to: equinox999equinox@yahoo.com
6. All completed submissions may not appear on any other site or blog before June 15th, 2009. Works in progress may be posted on other sites and blogs before June 15th, 2009. (This is to encourage people to talk about their creations and build excitement around the contest) Any entries found to be violating this rule will be banned from the contest.
7. Voting will be done by the readers of “The Realms of Equinox”. Photos will be placed on the blog and each follower will get to vote for their favorite entry. Voting will take place between June 1st, 2009 – June 12th 2009.
8. The winner will be announced on June 15th 2009. The Winner of the contest will receive their choice of either the new Imperial Guard Cadian Command Squad or Imperial Guard Catachan Command Squad. (Note: The prize will ship directly from the online provider, to save cost on shipping. If the winner is International, please allow extra time for the prize to arrive.)
9. If you have any questions, please post them in the comments section of this blog entry.

DAKKADAKKA 'Get Your Teach On!'

THE RULES:
1) Your Tutorial thread must be posted in the Dakka Painting and Modeling Tutorials forum (this one) during the month of May.
2) All of the tutorial content (text, images, videos, etc) must have been created by you and may not have already been displayed as a tutorial elsewhere on Dakka or any other website. Tutorials found to have been posted elsewhere or that contain someone else's work will be disqualified.
3) The tutorial must actually be a tutorial about something pertaining to the wargaming hobby. It must include pictures and text explaining the different steps, and it must have different steps; just posting a beginning and ending picture of a model won't cut it!
4) All photos used for the tutorial MUST be hosted by Dakka (we don't want 'em disappearing a few months down the road). This can be most easily accomplished by uploading your photos to the Dakka Gallery. If you need any assistance uploading your pictures to Dakka (or how to link to your photos once you've uploaded them), feel free to post your questions in the Nuts & Bolts forum.
5) The day (or so) after the deadline, a thread will be created listing all of the qualifying tutorial threads along with a public poll for the community at large to pick their favorite tutorial from the bunch.
6) Public voting will last for 4 Days. At the end of which, the top five tutorials with the most votes in the poll are the finalists.
7) From the five finalists, a winner will be selected by a panel of judges. Judges will be selected by the site's administrator (me).
8) Admin and Mod participants can't become finalists or win the prize, but don't let that keep you from voting for them! Defeating one another is more than enough of a reward for us... THE

DEADLINE: In order to qualify, all tutorial threads posted must follow the rules above and must be posted anytime during the month of MAY 2009.

THE PRIZE: The prize for this challenge is our biggest yet! It is £130 (GBP) in-store credit plus free world-wide shipping with one of Dakka's fantastic partners, WaylandGames.co.uk. That's nearly $190 in US currency worth of product!!! A tremendously huge THANK YOU has to go out to Dakka user the sponsors for this challenge, both WaylandGames.co.uk and Dakka user LBursley, who not only came up with the idea for this contest (just because he wants to see what amazing tutorials people can create) but also put up a tremendous amount of his own money as part of the prize!